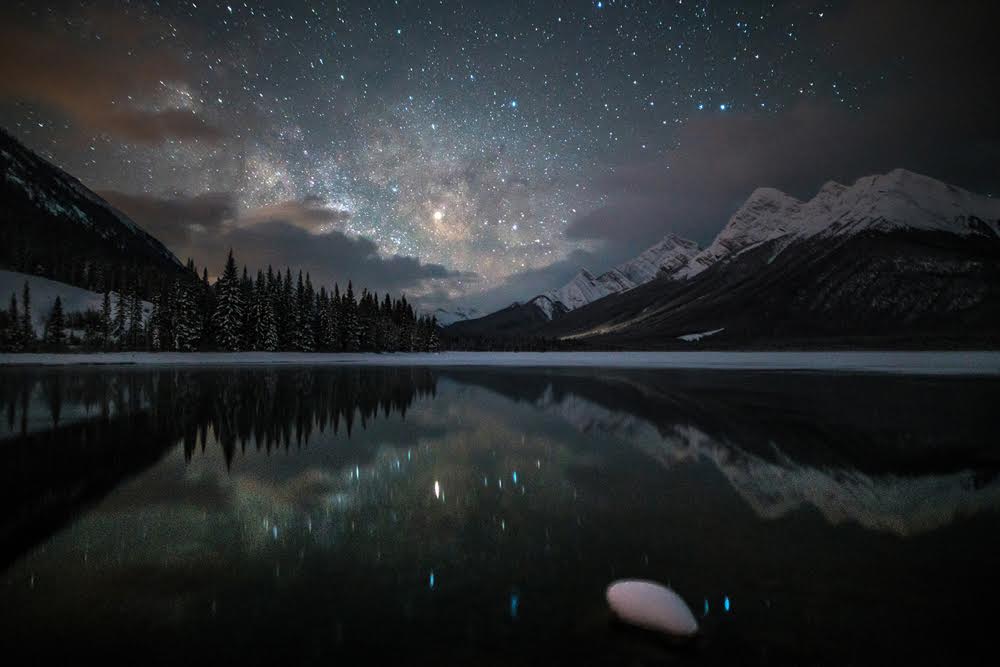
Cold weather is the best time for night sky photography and starscapes
Grab your coat and your camera, then head out under the stars.


Spray Lakes Reservoir
Cold weather provides an awesome opportunity to observe the night sky, and even capture it with your camera if you don’t mind a little prep work. Here’s why the stars are so clear in the cold, and some tips for shooting photos of the stars from professional photographer, Jack Fusco.
What’s with all the stars?
The air above us is colder, which means it can’t support as much moisture and results in fewer obstacles between your eyes or camera and the heavens. According to Fusco, this is a boon for photographers during the day as well. “These conditions can provide a great looking image at sunrise or sunset.”
It also has to do with what part of the galaxy we’re actually trying to observe. The stars we see in the northern hemisphere winter are in our local spiral arm of the Milky Way. That translates into brighter stars and less light pollution to make things appear hazy.
Find a really dark spot
Even though the universe isn’t throwing much light pollution at you, other pesky humans are with their cities and civilizations. You’ll want to use an app or a map like Dark Sky Finder to get far enough away from light pollution so it won’t taint your view or your photos. It should be darker than the end of a Black Mirror.
“When picking a location somewhere within this time frame, I’ll research historical weather data to see what month has the highest number of clear skies and stable weather conditions,” says Fusco. Clear sky.com provides a handy map of astronomical observing weather forecasts.
The cycle of the moon also comes into play when it comes to finding dark skies. “The brightness of a Full Moon can wash most stars out of the sky,” says Fusco. “For most stargazing, you’ll want to plan to be out on or near the New Moon.”
Bring the right gear
Heading out to shoot in the cold is different than a casual stroll through the park with a camera or binoculars. “If you’re going to be set up in the same location for a while, the same clothing that keeps you warm on a cold hike may not be sufficient,” says Fusco. He recommends dressing in layers. Some charcoal hand warmers don’t hurt, either.
In terms of camera gear, you’ll want a wide angle lens with the widest possible aperture for letting in light—the sky is dark after all. You’ll also want a sturdy tripod to hold your camera still because you’re going to be using a long exposure time, which invites unwanted blur from camera shake. Your hands can’t hold a camera steady for 30 seconds, even if they’re not shivering. Even when the camera is sitting on a tripod, pressing the shutter button can introduce camera shake into the equation. Consider switching over to the camera’s self-timer mode or get a remote release cable.
Bring a lot of camera batteries because they drain very quickly in the cold, too. If you think you have enough, bring more.
Get the right settings
Your settings are going to change from place to place, but Fusco recommends starting with a wider aperture (f/2.8 or below is ideal), an exposure time of 15-30 seconds, and an ISO setting (which determines how sensitive the camera is to light) of 1600 to 3200.
If you’re familiar with camera settings, you probably know that ISO 1600 or 3200 start to introduce a fair bit of digital “noise” into the image as the camera tries to amplify the light hitting the sensor. This is another reason the cold weather is good for night sky photography. “As your camera sensor heats up, the quality tends to be impacted as well,” says Fusco. Shooting in the cold helps combat heat build up and can result in less noise.
You should also set your camera to capture raw photos instead of compressing them into JPEGs. Raw photos require some extra editing later on in software like Lightroom or Photoshop, but they don’t discard precious image data for the sake of compression like JPEGs. It will give you a lot more freedom later on during the editing process.
Expect your camera to do weird stuff
“Last winter I found myself shooting the Northern lights in Yellowknife, Canada with temperatures dipping below -30,” says Fusco. “After 3 hours or so both cameras had pretty cryptic system error messages and just stopped working. It took about an hour of warming both cameras up before I was able to head back out to continue shooting.”
He also recommends you don’t forget the coffee. Lots of it.
