Lighting Tip: Faking a Rainstorm
Create and light rain effects


Stephen Carroll, a freelance photographer from Reston, Virginia, specializes in artwork for book covers, with more than 400 (mostly novels) to his credit. They’re not just any book covers, though. His genius lies in creating film noir-like scenes, complete with desperate lovers, soaked T-shirts, smoking guns, and, of course, stormy weather. “I do cinematic stock photography,” he says, “and there’s nothing like the dark of night and pouring rain to remind you of early Hitchcock.”
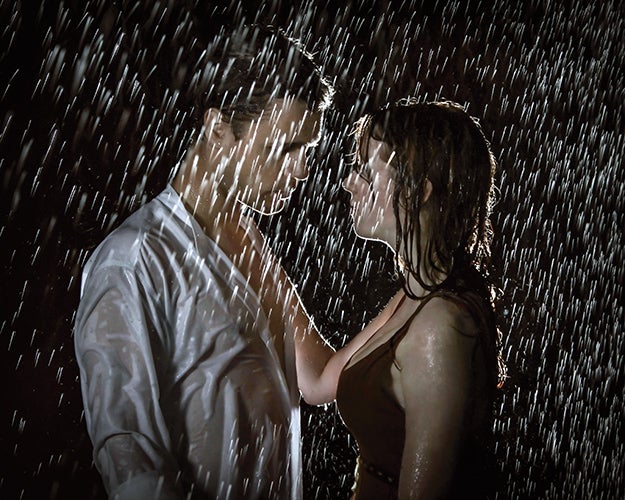
But it took Carroll a while to nail the cinematic look. Rain’s transparent quality is hard to light. “You can’t frontlight it,” he says. “You can only see falling water when it’s backlit.”
Be careful that your backlights don’t shine directly into the lens, because if they do, you’ll get flare and lose the noir look. Put them off to the side or directly behind and blocked by your subject.
A single backlight will work, as this shot proves. That’s how Hollywood usually does it, because it adds more contrast and drama. For full figures, though, you need two backlights. “And that’s a problem, because a backlight on each side produces two reflections on each drop. You get so many white streaks that you almost can’t see the subjects,” says Carroll.

The light source makes a difference with rain. Off-camera hotshoe flashes produce snow-like points of light because of their quick flash durations. A continuous light source yields straight streaks of light; the longer your shutter is open, the longer the streaks will be. Carroll’s preference? The “tadpole swimming upstream” effect that is produced by a studio strobe. “Its initial pop is very bright, producing the ‘tadpole’s’ head. As the light slowly dies, it produces a progressively thinner ‘tail.’”
But there’s one important fact to keep in mind: Water and electricity don’t mix. If you’re shooting with studio strobes outside, your outlet should be a ground fault circuit interupter (GFI). This will kill the electricity instantly if water causes a short circuit. If you have the choice of shoe-mount or studio strobes, or if you’re just starting out with such techniques, go with the shoe-mount to eliminate the risk of electrocution.
By the way, Carroll did not shoot this photo in actual rain. Instead, he created the scene outside using a garden hose and sprayer. The sidebar and illustration will tell you how.
