High-Speed Droplet Photography: An Introduction
With the right kit, it's easier to capture liquid splashes than you think

Droplet photography—the high-speed capture of liquids striking liquids to form crowns, pillars, and magically suspended drip shapes—uses an infrared beam as a flash trigger to catch the rebound shapes. Now, thanks to advanced and inexpensive microprocessors, you can create even more complex images.
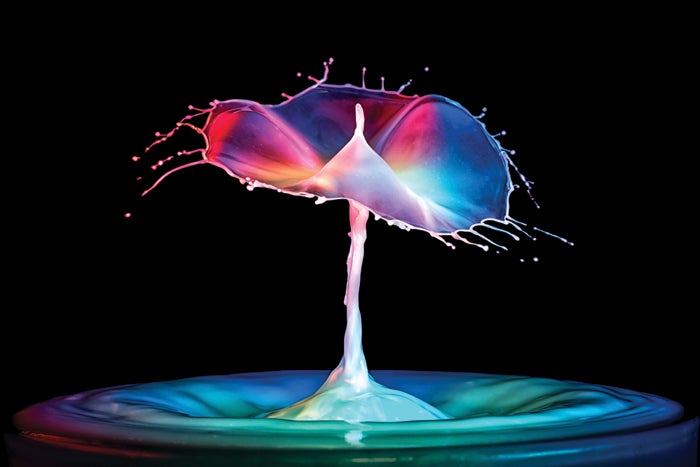
Called drip collisions or drop-on-drop photography, the new approach produces images like Markus Reugels’ here: One drop splays into a disk shape upon striking a pillar created by another drop. Reugels, a German master of this technique, shares scores of them at markusreugels.de, each more amazing than the next.
If you already own a camera, 1:1 macro lens, and shoe-mount flash, you’re halfway home. You can gin up your own timing system, but it’s easier to buy a solution such as the Cognisys StopShot Water Drop Photography Kit ($400, direct, www.cognisys-inc.com). It supplies an electronically controlled valve, infrared beam transmitter, cables, and a StopShot microprocessor that controls all the components and timing intervals. While we based our step-by-step instructions on this kit, you can adapt them for any rig. (Reugels markets his own microprocessor called the GlimpseCatcher.)
Once you’ve got the droplet and flash timing down, the creativity starts. Varying the dripping frequency, for example, effects the shape of the second droplet. Then, introduce color by adding food coloring to the liquid or gels over your flash head(s). For this photo, Reugels used red and blue gels over multiple snooted and carefully aimed Vivitar shoe-mount flashes.
Step 1
Gather your gear. It’s easiest to start with a drop kit. Your DSLR and flash(es) will need electronic remote firing terminals. A 1:1 macro lens helps. To freeze the droplets, flash duration in manual should be no longer than 1/16,000 sec. At 1/32 power, this is fairly common.
Step 2
Set up a staging area. Follow your kit’s instructions: Attach controller cables to the drip valve, flash, and IR trigger. Place the flashes as close as you can to the drip pool; set the valve and IR beam at recommended heights. With the Cognisys kit, program suggested times into the StopShot.
Step 3
Pick a liquid. Milk and cream produce well-formed shapes. (Reugels used the latter.) You can also use colored water, but it must be thickened with, say, guar or xanthan gum, then filtered.
Step 4
Make an exposure. In a darkened room with the camera’s shutter set to Bulb, use an electronic release to open the shutter. Start the drip: Two drops fall in sequence, an IR beam senses when the first passes, and the flash fires as the two collide in the drip pool. Close the shutter.
Final Step
Fine-tune the timing. The StopShot’s Auto Increment mode automatically lengthens or shortens intervals between drops and flash bursts until your timing is perfect.