How To: Make an Easy Abstract Photo
Creative ideas are close at hand.

Andy Teo, a family physician from Yateley, Hampshire, UK, has a thing for 1950s sci-fi flicks—the ones with flying saucers that were really pie pans swinging from strings. Teo’s Flickr stream (flickr.com/photocillin) has dozens of pictures in which he transforms kitchen utensils and children’s toys in surprising ways.
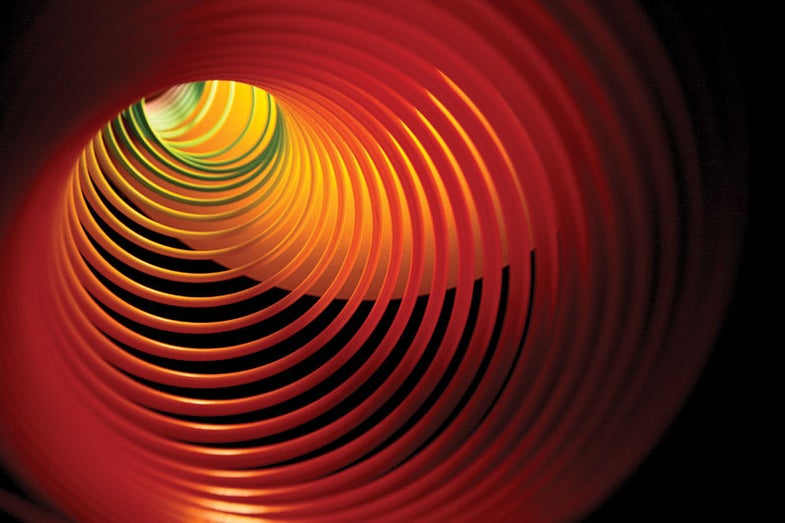
For his “Let’s Pretend Space Travel” series, for example, Teo turned cheese graters into sparkling space ship power generators, rows of cookie cutters into metallic snake monsters, and Slinkys into time-travel tunnels.
“I’ve always been fascinated by time travel,” he says. “In lots of sci-fi movies, it’s depicted as a journey down a tube with twists. A Slinky is just that: a long flexible tube, with recurring concentric circles and twists.”
After he made this connection, this image was simply done: His daughter held a multicolored Slinky—no gels or filters—against the dining-room ceiling lamp. He held his camera and lens at the opposite end of the toy and fired away.
It’s fun conceiving and executing these trompe l’oeil experiments, says Teo, “especially because my daughters get involved and it becomes a form of family fun.”
Also nice? Getty Images has turned the images into a source of income for Teo by adding them to its popular library of stock photography.
Follow Andy’s tips below and you too can transform a plastic toy into an object of mystery:
Step 1
Search your home for photogenic objects. When examining potential subjects, imagine them under unusual lighting or from very close in. Try to “photographically reimagine them,” Teo advises.
Step 2
Get the right photo gear. For this Slinky shot, Teo went with an ultrawide lens because its apparent perspective distortion exaggerated the toy’s depth: It rendered the nearer concentric circles large, and the distant circles small.
Step 3
Play with your subject. Experiment with light, subject, and camera placement. Teo learned with the Slinky, for example, that stretching it too far allowed too much distracting background to show through its rings.
Step 4
Grab an assistant. It’s often too much for one person to juggle subject, camera, and light placement. Mispositioning any of these elements can sink a shot. For this reason Teo asked his daughter to help. She continuously repositioned the Slinky as he fired the camera when appropriate.
Final Step
Play with exposure. Gross under- or over exposure can add mystery or an otherworldliness to a subject. Teo underexposed this shot for dramatic intensity, and then darkened the corners to force attention on the vortex of his tunnel. “Vignetting is your friend,” he quips.