Tips for Shooting Panoramas
David FitzSimmons explains the cameras and lenses you need, which settings to use and how to rotate your camera to create rich, life-like panoramic images.

Cameras and Lenses
Any camera can produce images for stitching. Digital cameras are easier to use in most cases, but film scans also work. Higher resolution originals, of course, yield richly-detailed final images. For sweeping landscapes and 360° x 180° (full sphere) panoramas, use a wide angle lens with a focal length of 28mm (35 mm equivalent) or wider. Some programs, such as RealViz’s Stitcher, can even use circular fisheye shots. For 2-D panoramas (stitching rows and columns) of specific objects, use a telephoto lens (80-200mm lenses often work well). This allows you to make extremely high resolution images of all kinds of subjects.
Camera Settings
When shooting panoramas, operate your camera in manual mode. Use the same exposure for all shots, and keep the focal distance the same. Do not zoom during shooting. Finally, use existing light as much as possible, and avoid using an on-camera flash.
Rotating the Camera
Specialized panorama rigs like the one I use, the 3Sixty Panoramic Camera Mount from Peace River Studios, allow you to rotate the lens over its nodal point, the precise location where light rays entering the lens converge and cross. Not rotating over the nodal point can cause parallax, where objects close to the camera move in relationship to those in the distance. Parallax causes ghosting in stitched images. If you do not have a panoramic head, do not rotate the lens around you; instead, rotate yourself around the lens. Try to create about 30% overlap from image to image, and consider using a hot shoe bubble level to keep your camera straight.
Stitching Software
Besides RealViz’s Stitcher 5.6, here are some other recommendations:
• Photoshop CS3 ($649 new; $199 upgrade: adobe.com)
• Photoshop Elements 5 or 6 ($99 new; $79 upgrade: adobe.com)
• Autopano Pro 1.4.0 ($140: autopano.net)
• PanoStitcher ($29.95: pixtra.com)
• Autostitch (Free: autostitch.net)
Photoshop CS3 and Elements 5 and 6 use the same super-fast algorithm for their Photomerge function and leave you with a layered file, whose masks can be tweaked for better blending (although Photoshop’s automatic masking has always been excellent for me). If you already have one of these top-selling Adobe titles, you may not need a separate stitching program; none of the Photoshop packages, however, has options for creating interactive panoramas such as QuickTime movies. The sophistication of controls in Autopano Pro for planar or “snapshot” panoramas is quite good — with many adjustments offered in photo-editing programs like Photoshop — but Autopano does not offer interactive movie options. PanoStitcher, while limited in its controls, creates nice planar images and cylindrical QuickTime movies. You can save money with Autostitch, a no-frills program that does a decent job with some “snapshot” panoramas but is not suited for serious panorama photography.
David FitzSimmons is a freelance photographer and writer as well as an Assistant Professor of English at Ashland University in Ashland, Ohio. He previously wrote about Helicon Focus and its ability to create images with extreme depth of field. His photos have appeared on regional postcards, in international calendars, and in a variety of periodicals. Check out more of David’s work at fitzsimmonsphotography.com.
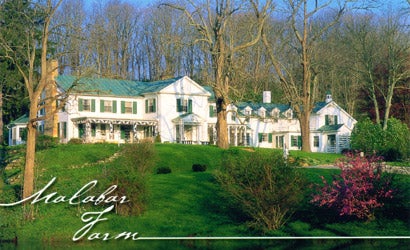
Malabar Farm Big House First Floor Virtual Tour
Use your pointer to navigate the virtual tour. When the pointer rolls over a hotspot, click to enter the next room. The QuickTime VR navigator arrow changes to a hand to indicate a hotspot jump-to zone.