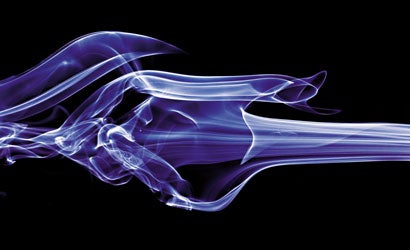
How To Photograph Smoke
Where there's smoke...there's a breathtaking photo you can make at home.

What fascinates me about the abstract shapes I find in wisps of smoke are the constantly shifting forms — they can be mesmerizing — and the fact that they can be captured photographically without much fuss or expense. I use a Pentax K10D, a Tamron 90mm f/2.8 Macro lens (with shade), a tripod, two strobes, and a black velvet backdrop.
First, I find a draft-free, dark room — the slightest breeze can disturb the smoke, erasing the shapes; and light from a window or lamp can strike the velvet, compromising its deep black.
After clipping the backdrop to a scaffold of black foam-core board, I aim my two 300-watt-second Qi-HE strobes so that their output can’t strike the velvet.
I make the smoke by burning incense. It’s healthier than tobacco smoke; it forms sensuous, even voluptuous shapes; and I can choose a scent that I enjoy. Cones are better than sticks because the smoke rises from a single point.
Next, I mount the camera on a Manfrotto 728B tripod and place the rig across from the incense and backdrop. A small, baffled flash atop the K10D triggers the two slaved strobes.
I don’t own a flash meter, so I wing my exposures, starting with the highest sync speed (1/180 sec) and bracketing apertures. I need the greatest possible depth of field for the billowing smoke to look sharp. At ISO 100, with the flash heads a stop or so down from maximum, my aperture is usually f/9. If the smoke seems soft, I crank up the heads and go to a higher f-stop, increasing the ISO setting if there isn’t enough light to get adequate depth of field. I rely on histograms and try to place the peak toward the right of the axis, without losing detail. Since smoke is almost entirely highlight, any clipping of the histogram spells failure.
Patience is the key. Once you’re set up, it can take several minutes just for the air to settle. (Your breath can blow the shot!)
Afterward, I use a little postproduction image-editing to help bring out the shapes. I use Curves to produce the blackest black and whitest whites, while holding all detail. I also fine-tune hue and saturation settings to enhance colors. Surprisingly, the smoke is naturally blue!
Take a lot of pictures, because it’s hard to catch nice patterns. You will discard most of the pictures you take. Finally, firing the shutter with an IR remote release reduces movement and keeps the air around your smoke undisturbed.
See more of David Boehm’s work at flickr.com/photos/davidboehm.
THE SETUP:
Two Qi-HE 300Ws lights (a) flank the black velvet backdrop (b), which includes side baffles (c) that prevent light spill from reaching the back wall of the set.