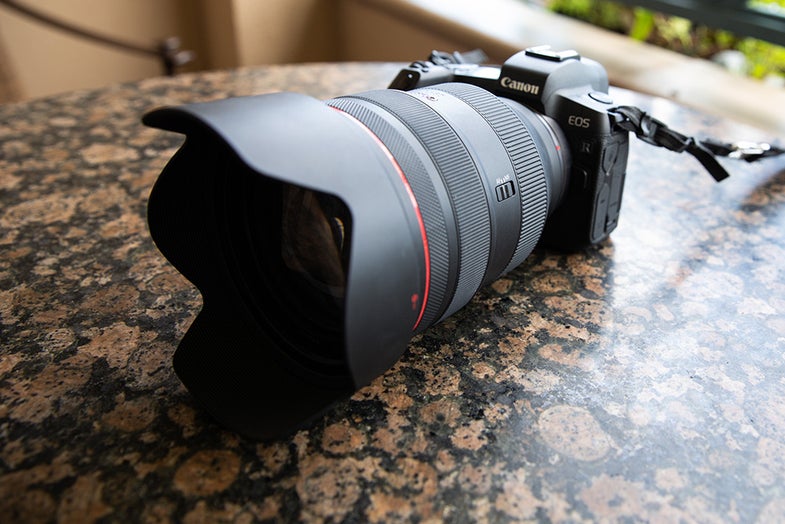
Canon EOS R full-frame mirrorless camera: Hands-on and first sample photos
The first shots and our initial thoughts on Canon’s new mirrorless full-frame system.

We may earn revenue from the products available on this page and participate in affiliate programs. Learn more ›
Earlier this week Canon announced its highly anticipated mirrorless full-frame system, the EOS R, to the world and over the last few days I spent some time shooting a production model of the camera.
In case you missed the announcement, here’s a top-level overview of the specs. The EOS R features a specifically-designed RF mount with a 54mm internal diameter and a 20mm flange distance. The camera is built around a 30.3 MP CMOS sensor (the same sensor as the 5D Mark IV) with an ISO range of 100-40,000 with an expandable range to 102,400 ISO and 5,655 manually selectable AF points.
During my time with the EOS R system I shot with a RF 24-105mm F4 L IS USM, RF 50mm F1.2 L USM, RF 28-70mm F2 L USM and a few EF mount lenses thanks to the Control Ring mount adapter.

Design and feel
If you are a Canon DSLR shooter the menu layout of the new EOS R system is going to feel quite familiar, although there are some key differences on the body that might take some getting used to. In hand it feels solid, but noticeably lighter than a DSLR, even with its substantial grip. The most notable thing about the new system is that it’s highly customizable: particularly nice when it comes to features like the new M-Fn bar and the control ring dial found on the front of the new lenses and on the control ring adapter.
The main dial for controlling shutter speed is in a familiar spot on the top right of the camera, slightly below that you will find the controls for changing aperture. A dedicated ISO button is notably missing from the top of the camera: although you will find the setting to change that by clicking the M-Fn button (that’s also where you can find controls for things like your shooting modes, AWB, AF mode and exposure compensation). The mode button lives on top of the back dial, the button to switch to begin recording video is slightly above it. You will also find controls for LCD panel illumination and Lock on the camera’s top. On the back right of the camera AF-On, AEL/FEL and your AF point selection button are all found in familiar places. Q and Set are combined into one button located between four customizable arrow keys, which essentially replace the large multi dial found on the back of a DSLR. The Info button, trash and image review all move to the right side of the camera body.

The new M-Fn bar is the thing that DSLR shooters might find the most difficult to get used to. It’s located to the right of the viewfinder (a place where many people often find their thumb resting while shooting) and can be customized to control a number of features on the camera. It can be set to be activated with a tap of the finger (although you will have to wait for it to be “charged up”) or to activate it automatically (which means you run the risk of accidentally hitting it and changing a setting like ISO in the midst of a shoot).
As I said before, nearly everything on this camera can be customized depending on how you shoot, which is great, although figuring out what functions make sense to assign where may take some time to master. More on that later.

Shooting experience
My initial impressions of shooting with the EOS R camera have been very positive. The majority of the controls are located in intuitive places, the viewfinder is crisp and bright and the customization options on the camera are helpful. In the few days I had to shoot with the camera so far I found the AF to be very responsive. During our time with the camera I primarily shot in M mode, and for the most part found it to be comparable to the experience of shooting with a 5D system.
The touch focus screen is a huge benefit on this camera and has been designed in a way that you can program certain sides of the screen to respond to touch—to avoid your nose bumping into it and messing with your focus points.
The number of AF points was also impressive, and in the right scenarios, the face detection mode was quite nice.
The new M-Fn bar took some getting used to, it’s a bit finicky. My initial thought was to set it to control my ISO—a function that lacks a dedicated button on the top of the camera, but also one that, in my normal shooting scenarios, I’m least likely to change drastically. The tapping to charge feature definitely has a learning curve, as most shooters are use to their cameras reacting almost instantly. I’m looking forward to exploring this feature more in the coming weeks.

Although there are certainly some new aspects of this camera system that DSLR users might initially gawk at, I found the initial shooting experience to be quite lovely. For the most part, I was able to get the camera to perform in the way that I wanted it to and produce images that didn’t disappoint.
The new lens mount and lenses
The customizable control ring dial on the new lenses and on the new lens mount was one of my favorite aspects of this camera. In the majority of shooting scenarios I set mine to control the aperture of the lens, which gave me two ways to change the setting, dependent on the shooting scenario.
I found the control ring lens mount to be very responsive and enjoyed shooting with my trusty 24-70 F2.8 lens and a 85mm F1.4.

At first glance the new RF 50mm F1.2 L USM and RF 28-70mm F2 L USM seemed like they might be bulky and defeat the purpose of a mirrorless system. My first impression was wrong though. While these lenses are certainly a bit large, they’ve been designed in a way so that the majority of the heavy elements are towards the back of the lens closer to the sensor—this redesign actually makes them quite evenly weighted once they are mounted to the camera. They bokeh on both of them also looks amazing and either is a fine portrait lens. The RF 24-105mm F4 L IS USM is a more lightweight option and does exactly what you would expect it to do.
Other observations
I was surprised to find that Canon had also opted for a single slot memory card in the EOS R system. I liked that the camera takes the standard SD card, but as someone who is use to shooting to two cards at once, would have appreciated a second slot for making real time backups of my files.
Overall I’m incredibly impressed with the EOS R system thus far. I found the controls of the camera to be easy to learn and it feels like it will appeal to established DSLR users, but also people just getting into photography. I was happy with the image quality, impressed by the lens mount adapter (a make or break for photographers with a substantial glass collection) and the customization options seem huge. Look for our full hands on review of this new camera system in the coming weeks.
Check out sample images from the camera in the gallery below.


