How To: Set Up the Perfect Photo Studio
Here are four strategies for building studio kits that range from mini to mighty

Want to get serious about the lighting you take on location? You’ll quickly learn the meaning of the word “compromise.” Your lights should be extraordinarily compact, with an ample set of light-modifying accessories that are equally packable. Yet they must have as many features and almost as much power as their heavier, studio-bound brethren. Since you may ultimately lug these lights to the ends of the earth, you want them to be rugged enough to suffer abuse, but also to weigh as little as possible and to be simple to operate.

The Mini Kit/Backpack Kit
There’s more: Your location kits should offer the option of being battery-operable—not yet a given today. Not even the convenient Multiblitz backpack kit with two strobes, stands, and umbrellas can be battery-powered.
Of course, shoe-mount lighting remains an option, but to obtain bright enough output to do battle with the sun in strongly backlit scenes, you might need a case full of shoe-mounters, plus as many batteries, cables, and wireless flash triggers to sync the units. We prefer a single 300 Ws strobe to a handful of shoe-mount flashes.

The Kit That Fits in a Trunk
(B) Similarly, Lowepro’s capacious Pro Runner x450 backpack ($345, street) does double duty: It can hold two small power packs, strobe heads, cords, and a tripod for the field, yet its wheels suit it to city use, too.
(C) Also consider the all-metal, weatherproofed Surefire 6px Pro Dual-Output LED flashlight ($81, street). It will light your way after dark, but can also serve as a dual-power fill light.
(D) B&H’s Impact 12-inch reflectors ($10, direct) collapse to fit in a pack’s side pocket.
(E) The Elinchrom Ranger Quadra ($1,480, street) is already the lightest location strobe available, and a dramatically lighter lithium battery is in the works.
Of all today’s backpackable lighting options, the photographers we’ve spoken with agree that the Elinchrom Ranger Quadra juggles all these compromising qualities best. Scottish photographer Niall Benvie (niallbenvie.photoshelter.com), who captured the moth shown here, often uses them (though not for this photo).
The Santa Fe adventure photographer Michael Clark is also a convert (www.michaelclarkphoto.com). His blog/newsletter is crammed with Quadra-lit scenes. “I carry two complete Quadra setups (two packs and two heads) along with wireless triggers (Skyports or PocketWizards), reflectors, a shoot-through umbrella, a lightweight stand and even a small Elinchrom softbox with a grid all in a Lowepro Vertex 300 backpack,” he says. “I can also usually squeeze a camera body and a few lenses in there, too. It makes for a very versatile and portable setup.”
What do we like best? You can keep the Quadra kit packed and ready to go for spur-of-the-moment photo shoots.

The next step for strobe-loving photographers on the go is graduating to a studio and lighting kit that can be carried in an automobile trunk or a van. The additional gear this lets you bring on location can be liberating and will open up numerous lighting possibilities for portraits and interior architecture.
Jeff Green (jeffgreenphoto.com), who made this view of a Las Vegas restaurant’s private dining room, knew that he would need numerous spotlights to open up shadows and draw viewers’ eyes to the room’s most interesting features.
Green uses Arri hot lights exclusively for this type of location lighting, and carries everything needed to the site in his Jeep Grand Cherokee.
“I usually take three to four cases and a folding cart,” he explains. “Hot lights go in hard-walled Pelican cases, while the strobes and softboxes go in a large Tamrac rolling case.”
Continuous light sources like his Arris let you see their effects as you set up, and are a must for shooting video indoors. But hot lights, of course, generate a lot of heat. That is one reason that many location shooters prefer cooler and easier-to-handle strobe lighting.

The Stow at Home Studio
(B) The Multiblitz GlamKit 2 ($1,899, direct) location package is based on the rugged and well-designed Profilux Plus portable strobe; the battery will provide up to 1,400 full-power pops per charge.
(C) To balance the color of flash and ambient lighting, try the Rosco 55-Piece Strobist Filter Kit ($18, street) with its 55 acetate filters for shoe-mount flashes.
(D) The Impact Light Kit bag ($79, street) will hold two monolights, umbrellas, and lightstands, and its handle converts to a shoulder strap.
(E) Photoflex’s Litepanel diffusion wall ($570, street) includes stands and ballast bags.
(F) Adorama’s Flashpoint X-series radio trigger ($100, direct) will fire strobes wirelessly from almost 600 feet.
The good news? You can choose from dozens of location strobe kits, all of which would easily fit in a trunk. One of our favorites is the Multiblitz GlamKit 2 based on a Profilux Plus strobe like the one on our opening page. This $1,899 (direct) kit includes the strobe, a portable battery, trolley, an umbrella/softbox, stand, and case.
An important consideration for hauling lights around in your car: Protecting them. News and wedding shooters often line their trunks with foam padding, adding foam walls to create sections that separate grip (with little protection), lighting gear, and cameras (with lots of protection).

Semi-pro photographers who are serious about lighting and prefer studio to location work typically fall into two groups: Some want studio lighting that they can permanently set up in a dedicated bedroom or basement. Others—and we imagine this includes most of you—want a more temporary lighting solution, one that can be folded up compactly and conveniently slipped into a hall or bedroom closet.
You might be shooting tabletop products or crafts for online auctions or catalogues, taking portraits of children or pets, or selling headshots to actors. But if you’re just starting to get serious about lighting, and aren’t yet sure how much of your home—or budget—to dedicate to gear, there are some important factors to consider.
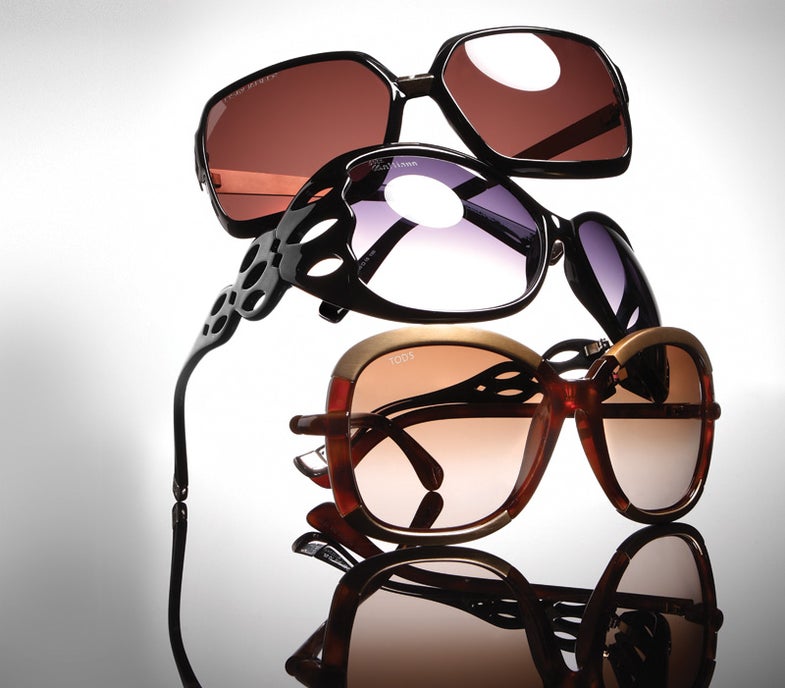
First, tailor your lighting purchases to suit your subjects. For a closet-based product studio, we like the compact proportions of easily stored LED lights, for example. They’re cool-operating, are a pleasure to work around, and their continuous output lets you evaluate your lighting effects as you work. LEDs are especially well-suited to small and stationary subjects such as these sunglasses.
But if you work with active subjects—young children or pets, for example—you will need the action-stopping capability of instantaneous studio strobes. If action-freezing is important, shop for strobes with extremely short flash durations, such as the 1/6500 sec White Lighting X-Series monolights (paulcbuff.com/whitelightning.php).
The other crucial consideration is, of course, the size of your storage space. In closet-stowed lighting setups, compact and collapsible products are musts. We prefer small, four-section lightstands over stands that have three-section legs, for example, because they fold more compactly.
To make the most of that closet space, New York-based pro Brian Klutch, who shot these sunglasses (brianklutch.com), also recommends hard-sided cases for their stackability.

The Bedroom Studio Kit
(B) The Adorama Flashpoint dimmable 500 LED studio light ($200, direct), at about 14x8x3 inches, will fit in a closet, is comfortable to work around, and, unlike most studio LEDs, fits most budgets.
(C) The Lastolite Cubelite Studio Shooting tent ($500, street) is designed for small product photography, folds flat, weighs just 3.5 lbs, and lets you work standing up.
(D) Tenba’s AW-MLC Medium Lighting Case ($618, street) holds up to two power packs and three to five heads, with an internal framework for structure. Klutch stores lighting gear in cases because “the protection they offer is essential.”
(E) Krylon Looking Glass paint ($14, street) lets you make studio reflectors to any size you like: Start by having glass cut at an art supply or framing shop, then spray one side to turn it into a mirror. In about an hour, it is dry enough to become a perfectly-sized reflector.
The good news? Almost every lighting tool under the sun is available in a compact, collapsible closet-storable version. Examples range from Chimera’s collapsible beauty dish (chimeralighting.com; $230, street) to the inflatable EPS El Macho Photo Studio (www.massieraindustries.com; from $1,899, street). This automatically inflates from suitcase-sized to a weather-resistant 15x11x9-foot studio you can set up in your backyard in minutes.

You will find many benefits to setting up a dedicated studio at home. Alas, few of us enjoy the luxury of a spare bedroom, basement, or garage that can be converted to a full-time, permanent photography studio.
Still, photographer Carol Weinberg did, and she reaped this wonderful portrait as a result. If this is something you’ve considered—and the room is free—you’ll enjoy many advantages.
For one thing, you can purchase more durable lights. Because the gear you buy for a permanent home studio will probably stay put, its size and weight won’t have the importance they do for location kits. This lets you invest in heavier, more solidly built equipment that could last a lifetime.
With your lights permanently in place, you won’t have to dedicate large swaths of time to setting up and breaking them down. That leaves you considerably more hours for shooting and creative exploration. Similarly, you can shoot whenever the mood strikes.

(B) The Broncolor Senso lighting kit ($3,457, street) is very bright (1,200 Ws) and ruggedly constructed, and it boasts cleverly designed elements such as reflectors that double as protective caps.
(C) Savage Floor Drops ($175, street) provide the look of handsome wooden floors even if you’re shooting on concrete. Made of thin polyester, they roll up for storage, come in a variety of styles, and can also be hung as backdrops.
(D) Chimera’s Window Pattern stencils ($30, street) throw evocative shadow patterns and also come in many styles—this one creates the effect of vertical blind shadows. (The light source must have a focusable fresnel lens.)
(E) The Manfrotto Sky Track Top 54 suspension system ($2,797, street) lets you hang lights from the ceiling, clearing your space of lightstands. The kit shown supports up to four lights. Carol Weinberg
Having full control over the studio gives you the ability not just to place and store your lighting tools exactly where they feel right to you, but to customize the whole room. If you enjoy using contrasty, dramatic lighting for your subjects, paint the walls black. If you like a softer, more suffused, diffused light, paint them white. Can’t decide? Paint them a neutral gray. A large, heavy frame will let you hang a variety of backdrops, including big rolls of seamless paper.
The ability to work, session after session, with the same lighting equipment deployed in the same way, gives you the luxury of long-term continuity. This can make for a great learning opportunity that photographers who must pack up after every shoot never get to experience.
Explore all the effects your lights are capable of creating. Because the setup is permanent, you can work for a few hours, experimenting with small, incremental changes in light placement and power. After a shoot, you can leave everything in place and later pick up your work exactly where you left off.
This strategy allows for trial-and-error experimentation over long periods of time. For many of us that is the key to lighting—and photographic—success.
Besides, nothing shows your family, friends, and prospective clients that you are truly serious about photography than installing a fully dedicated studio in your home. Now go clear out that garage!