Easy Wider
Grab your wide-angle lens for stunning views on land and water.

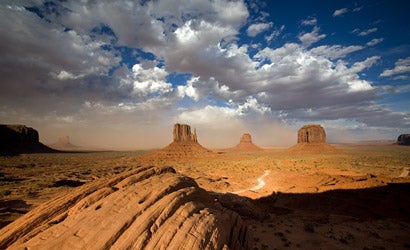
Every time I’m out on a shoot and reach for my 16-35mm wide-angle zoom, it’s like moving out of my first apartment and into my first house — suddenly the square footage doubles and there’s more room to furnish, more space to be creative.
But there’s also more room for mistakes. Wide-angle lenses cover so much territory that it’s easy to get home and realize those majestic mountains in the distance aren’t completely sharp, or overhead wires somehow made it into the frame. To avoid this, here are a few things I’ve learned (the hard way) that will help you remodel your wide-angle photos.
Use a tripod. You’re in total control of the entire frame when you use a tripod. Even if you think you can handhold for a sharp image, a tripod allows you to slow down your process and make small adjustments to your composition and exposure — and especially avoid surprises at the edge of the frame.
Get up, get down! Shoot at a toddler’s perspective or an NBA basketball player’s. This change in height combined with wide-angle perspective allows people to view a place in a unique way, as in the photo on the next page taken at Pismo Beach, CA.
Find a visual direction. I like movement in the frame; I get it by looking at where the composition is taking me. I prefer to have a strong foreground element lead the eye from the lower frame into the scene. In other cases, the movement is diagonal, as in the Pismo Beach shot above.
Capture a full color range. When shooting landscapes, some element of the scene (usually the sky) usually falls out of the range of the camera’s digital sensor (or slide film). To preserve the detail and contrast, use split neutral-density filters.
Watch out for lens flare. Even if there isn’t obvious glare, it’s easy for sunlight to come from the side and cast flare across the front of a wide-angle lens. You can lose 50 percent of your contrast and color saturation in the scene — when I first started shooting landscapes, I didn’t even realize this was happening in some of my images! Always check the front of your lens to see if any light is hitting it. Use the lenshood, your hand, or a hat to block any sunlight from ruining your shot (but be sure not to let it wander into the frame — another reason to use your tripod).
Avoid the polarizer blues. A polarizer can present a dilemma. These filters don’t deepen blue sky evenly; they are most effective for a band of polarization that appears as an arc at a right angle to the ray of the sun. This is unnoticeable when shooting water or in the woods — places where there aren’t large swathes of blue sky. But in a wide-open space, an ultrawide lens can take in enough field of view that the uneven polarization leaves an awkward, dark blue blotch in the sky. Either zoom in tighter and recompose, or stow the polarizer and use a split ND filter. Start with a 0.3 (1-stop) filter for a bluer sky and a little boost in brightness to your foreground.
Maximize depth of field. I set my camera to aperture-priority and usually shoot at the smallest aperture — f/22 — to ensure maximum sharpness through the entire scene. I let the camera’s evaluative metering mode decide my initial exposure, which usually comes pretty close to the result I want. I glance at my review screen and make final adjustments by a fraction of a stop, if needed. But if I’m using split ND filters to help tone down the brightness of the sky, I’ll usually have to go as much as 2 stops under the meter reading to avoid overexposing.
Mind your speed. When shooting a landscape that has moving elements (waves, wildflowers in a breeze) that you want to freeze, widen the aperture 1 or 2 stops for a faster shutter speed. You sacrifice a little depth of field but can reduce or eliminate motion blur.
Focus for depth. The rule: Focus on an object about one-third deep into your frame. If your lens has a depth-of-field scale, you can also set the lens to hyperfocal distance. Double-check this by using the depth-of-field preview button that most DSLRs now sport. This lets you view through the lens at shooting aperture rather than wide open, although your view through the finder will be dimmed. For better viewing, I often put a black focusing cloth from a view camera over both my head and the camera. If the camera is set to the smallest aperture and you’re still unable to get all of the elements into focus, then you’re just too close to the nearest object. Back up a little and try again.
Getting Hyper About Focusing
To capture detail from infinity to close up, set the lens to its hyperfocal distance. You can do this by trial and error, but if your lens has a depth-of-field scale, you can do it quickly and accurately. Adjust the focus of the lens manually so that the infinity mark is indexed to the lens aperture being used. Depth of field extends from infinity to the distance indexed to the working aperture at the other end of the scale. It’s still a good idea to visually check the actual depth of field with the viewfinder and preview button.