How-To: Use Custom Presets In Lightroom Mobile
Want to use your VSCO or other presets in Lightroom mobile? Here's a workaround.


Lightroom Mobile has come a long way since its start, and it now includes the vast majority of the features you expect to find in the desktop version. One feature that’s not officially supported however, is the use of custom and pre-made presets, like those from VSCO or Mastin Labs. Recently, however, a rep from Adobe shared a clever trick to get all of those presets working on the mobile version, and it’s really simple.

In order for this to work, you obviously need a Creative Cloud account so you can sync images and collections between the desktop and mobile versions of the software. Once you’re syncing, create a collection called “presets.” I named mine “!presets” so it would show up first an in alphabetical list.

Now, find an image in your library and apply the chosen preset or adjustments. Once that image is added to the “Presets” collection, it will sync up to Lightroom mobile. It makes sense to use visually distinctive photos for each preset or set of edits you want to keep on hand so it’s easy to tell which is which. You could even make a graphic with the preset name to use as the base image if you plan on keeping a ton of presets on-hand.

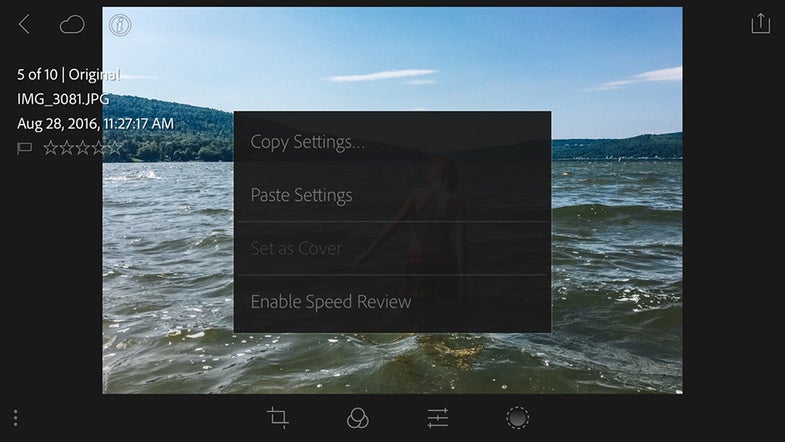
Once you open Lightroom Mobile, the Presets collection will have your image as well as all the edits made to it. A long press will bring up the menu, which includes a “copy settings” option. Selecting it will let you pick and choose the specific edits you want to copy over.

Now, you simply select the image to which you want to apply the preset and long press to bring up the menu again. This time you should have the option to paste the settings.

The presets may need a bit of tweaking to look right with the images that come from your smartphone camera because they can be very different from raw files you’re used to working with in desktop Lightroom, but it’s certainly a start.
